A class is a group session that repeats, like a Tuesday evening flow at 6pm. You go through six short steps, and when you choose Create and go live at the end, the class is on your booking page straight away with its dates for the next three months. People book each date separately, so someone can come every week or only now and then.
Before you start, it helps to know the day and time, the price and how many people you can take. Nothing goes live until the last step, so you can go through the steps and come back to change things first. If you're not sure a class is the right type, see Choose the right type of event.
Put a weekly class on your booking page
- Go to BookingsClasses and choose New class. On a phone, Classes is in the More menu along the top of Bookings.
- Type the class's Name, such as "Gentle evening flow". The page address is made from the name, and Change lets you set your own. Choose Continue.
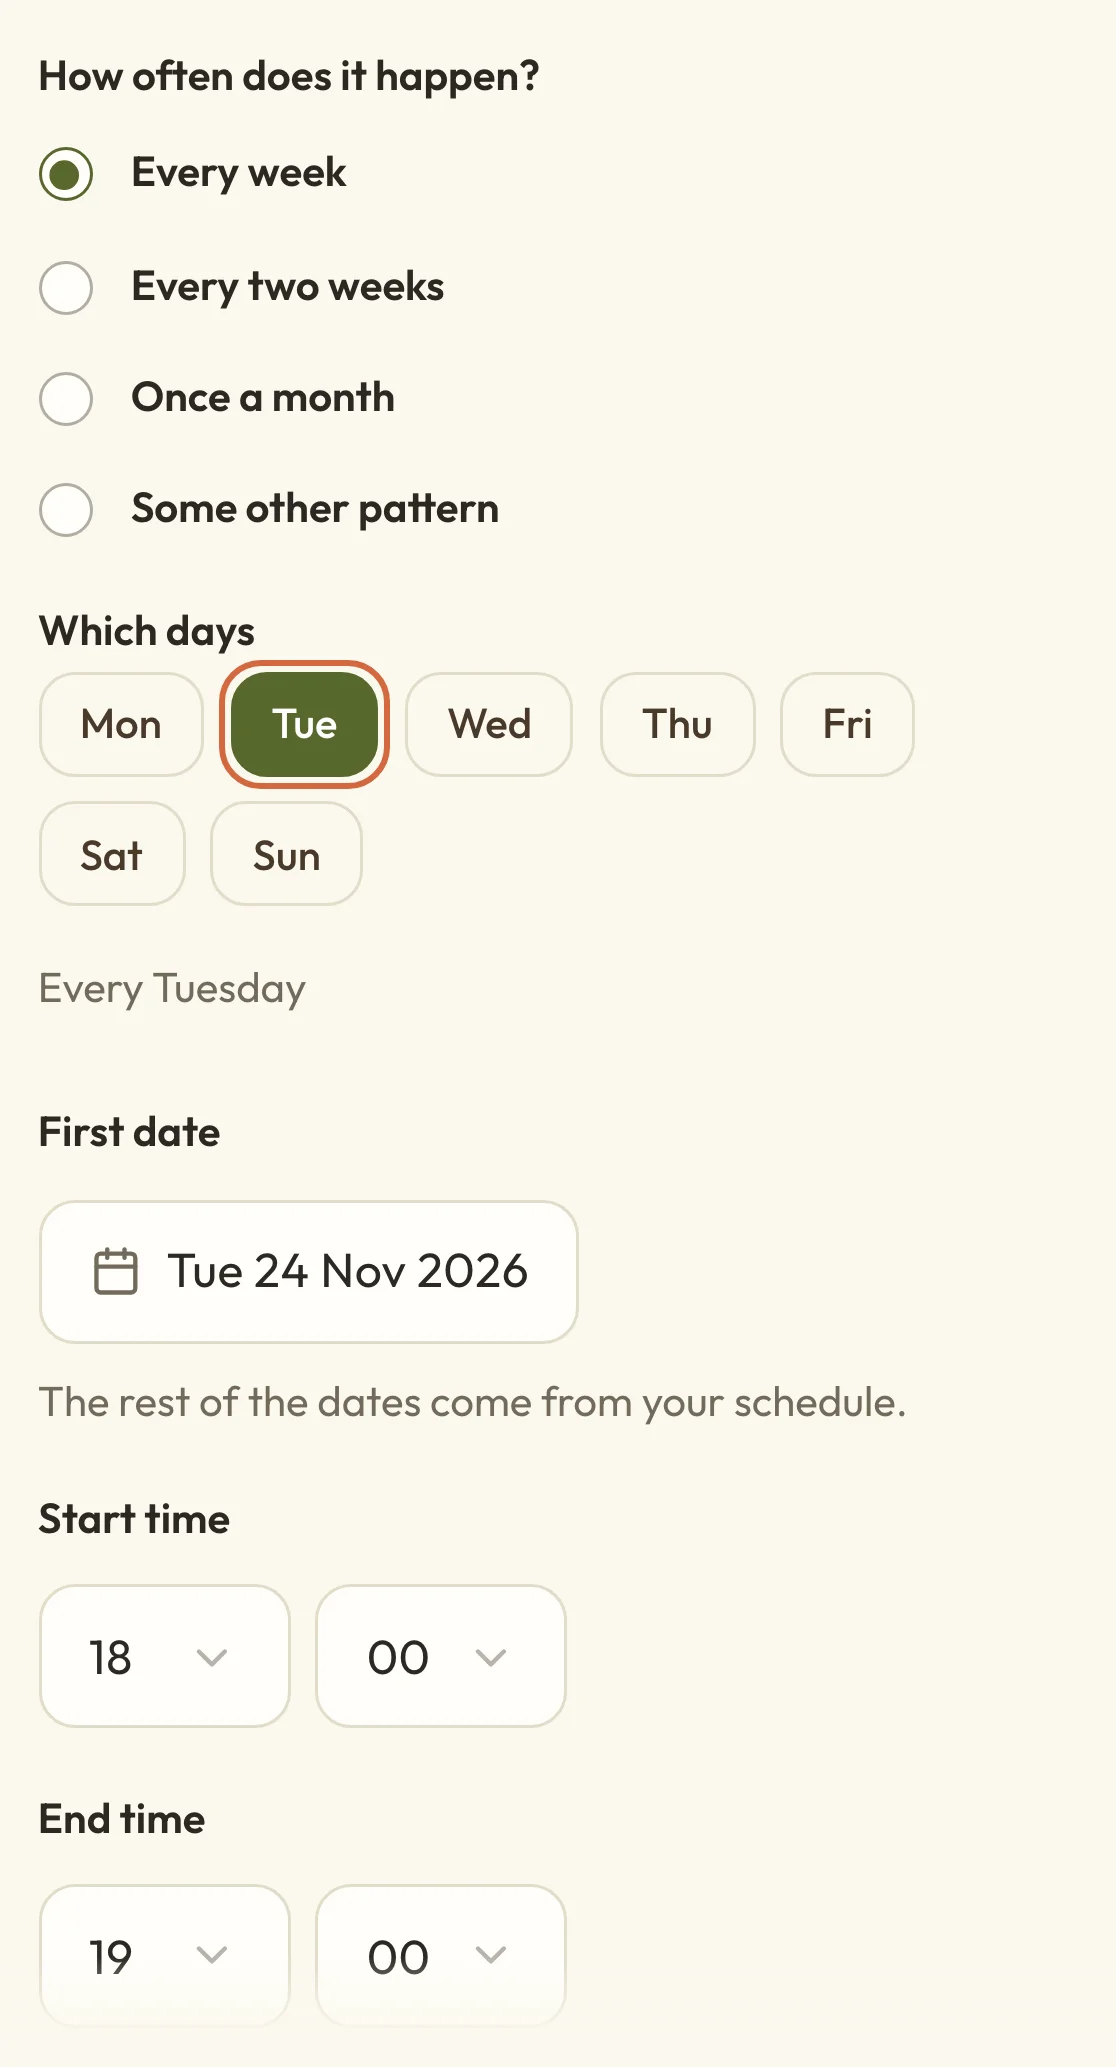
- Under How often does it happen?, leave Every week and choose the day under Which days.
- Pick the First date. Only the day you chose can be picked in the calendar, so if every date is greyed out, check the day first.
- Set the Start time and the End time. They use the 24-hour clock, so 6pm is 18 for the hour and 00 for the minutes. The end time fills in an hour after the start, so change it if your class is a different length.
- Leave How long does it run? on Ongoing for a class with no end date, or choose how many sessions it runs for or the date it stops. Choose Continue.
- Choose how people take part. For a class in person, pick a venue under Venue or add one with New venue. For an online class, add your meeting link, which people get in their booking confirmation. Choose Continue.
- Choose Single price and type the Price. Turn on Limit places if you have a limit, type the number under Places, and choose Continue.
- Add a Short introduction and a Picture if you have them. Both are optional, and the card next to them shows how the class will look on your booking page. Choose Continue.
- Read the summary under Check it over, then choose Create and go live.
 (opens the full-size picture in a new tab)
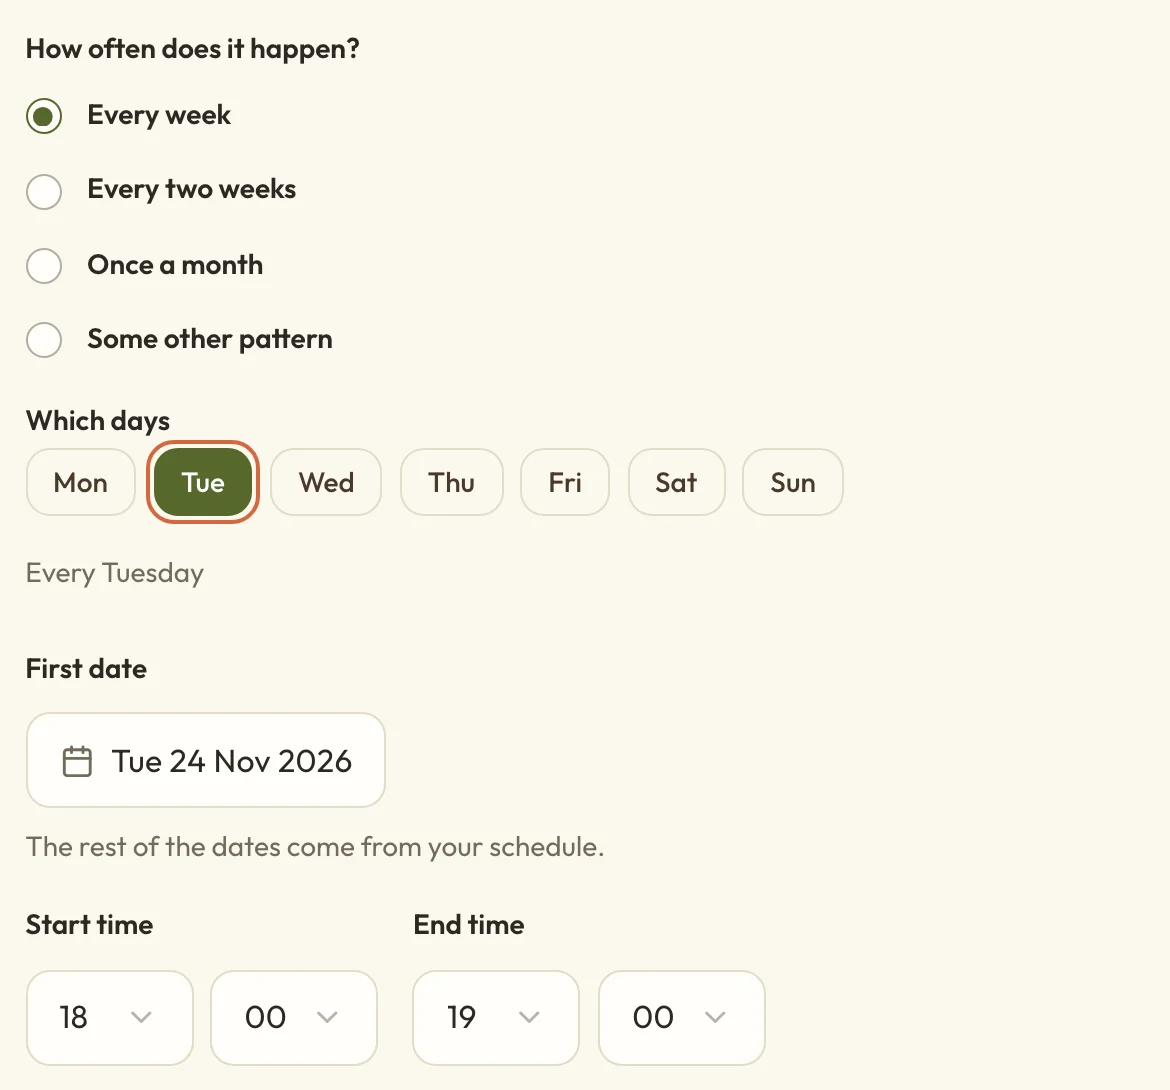 (opens the full-size picture in a new tab)Pick the day first, and the calendar only offers that day.
If you leave partway through, the steps pick up where you left off when you come back on the same device, with a note saying Draft restored.
Check your new class is on your booking page
Once you've chosen Create and go live, the class is on your booking page under your classes, with its next three dates and how many places are left. Clients can book any date straight away, and they get a confirmation email when they book and a reminder the day before.
To see it as a client would, open the class from BookingsClasses and choose View page. Its page shows the next date, the other dates coming up and the price, and people choose a date to book.
The class shows your name as the person running it. If you have a team, you choose who's running it on the Where step, under Who’s running it?
Your passes and memberships that cover classes work for a new class straight away. To change that or anything else about booking, such as when bookings close or your refund rules, see Set an event's price, places and booking rules.
If you saved your class as a draft
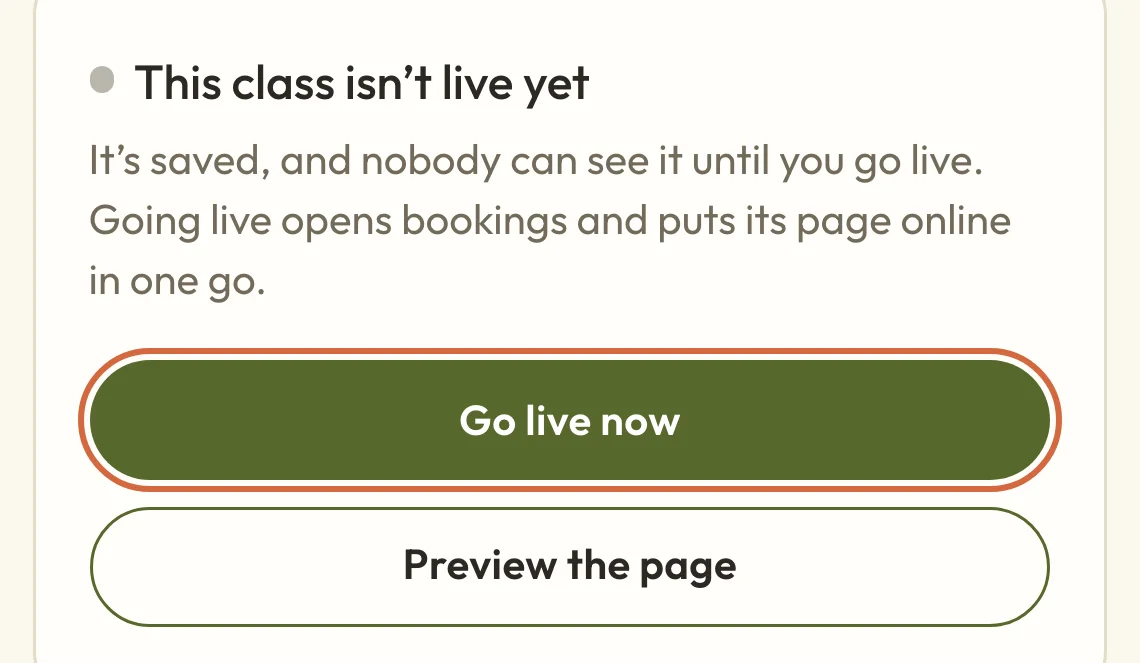
A class you saved with Save as a draft isn't on your booking page, and anyone opening its address sees a "Page not found" message. Only you can see it. To look at it the way a client would, choose Preview the page.
 (opens the full-size picture in a new tab)
 (opens the full-size picture in a new tab)A draft class is saved, but nobody can see it or book until you go live.
When you're ready, choose Go live now, or open the class from BookingsClasses and choose Go live. A box sums up what's about to happen, and choosing Go live there opens bookings.
The same box has Announce it first, open bookings later. That one takes effect as soon as you choose it, and you aren't asked to confirm. It puts the class's page online with "Bookings open soon", but it doesn't appear on your booking page yet, so you'd need to share the link. Choose Go live later to open bookings. There's more in Publish or unlist an event.
Skip a week, like Christmas
To take a week off, add the class as every week and then cancel the date you're not teaching. There's no way to leave a week out while you're adding it.
- Open the class from BookingsClasses and go to Dates.
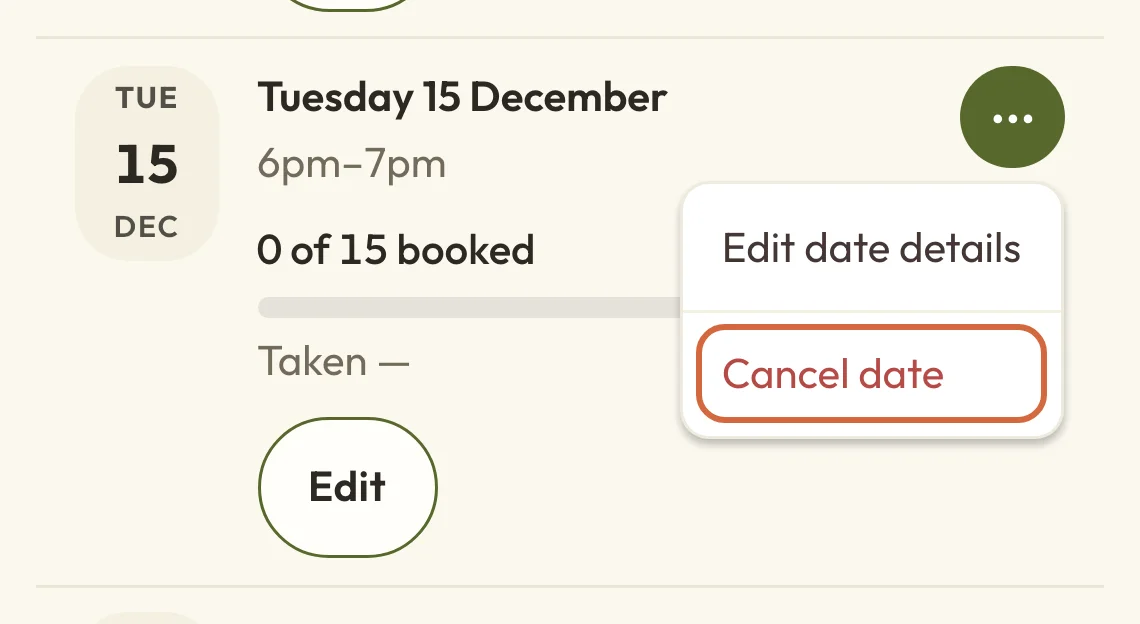
- Open the menu on the date you're skipping and choose Cancel date.
- A review shows the date and how many people have booked it. Choose Cancel date to go ahead, or Keep date.
 (opens the full-size picture in a new tab)
 (opens the full-size picture in a new tab)Each date has its own menu with Cancel date.
The date disappears from the class's page, so clients see the week before and the week after with nothing in between. The class keeps going every week as before.
If people have already booked that date, their bookings are cancelled and they get an email. The review lets you decide their refunds before you confirm. See Change or cancel event dates. If you're closing for a holiday across everything you offer, see Close for a holiday or break instead.
Run a class every other week or once a month
Under How often does it happen?, choose Every two weeks or Once a month instead of Every week. For anything else, such as every three weeks, choose Some other pattern and set how many weeks it Repeats every.
The first date has to be on one of the days you chose, and the rest of the dates follow on from it.
To change the pattern of a class you've already added, see Change a repeating schedule.
How far ahead people can book a class
How far ahead can people book?, on the When step, starts at 3 months, so people can book any date in the next three months. You can choose 1, 6 or 12 months instead. New dates keep being added as time goes on, so an ongoing class never runs out of dates.
Run a class without a venue or online
If you teach from home or haven't got a room yet, choose Address shared after booking under Venue. The class's page says the address comes after booking, but Macadamia doesn't send it for you, so you'll need to email it to people yourself. See Run a class without a venue.
For an online class, choose Online under How do people take part? and add your Zoom or other meeting link. People get it in their booking confirmation. If you leave it blank, you'll be asked for it before the class can be created.
Change or remove the class later
You can change the class after you've added it, and dates that haven't happened yet show the new details. See Edit an event's details and booking settings and Change or cancel event dates.
If you added a class by mistake and nobody's booked it, you can delete it from the menu next to Edit details. See Cancel, archive or delete an event.